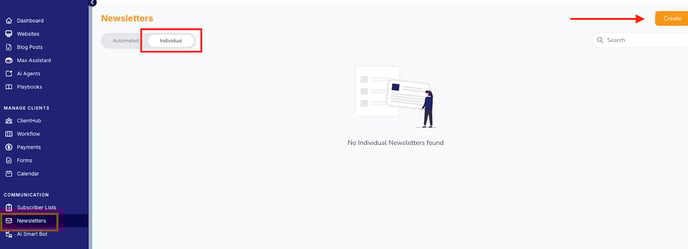
Step 1: Navigate to the Newsletter Section
- Log in to your ClientHub.
- From the left-hand menu, click on Newsletter.
Step 2: Switch to the Individual Tab
- Once in the Newsletter section, click on the Individual tab at the top of the page.
This area is dedicated to sending newsletters to one off emails to clients or email lists. - Click on Create
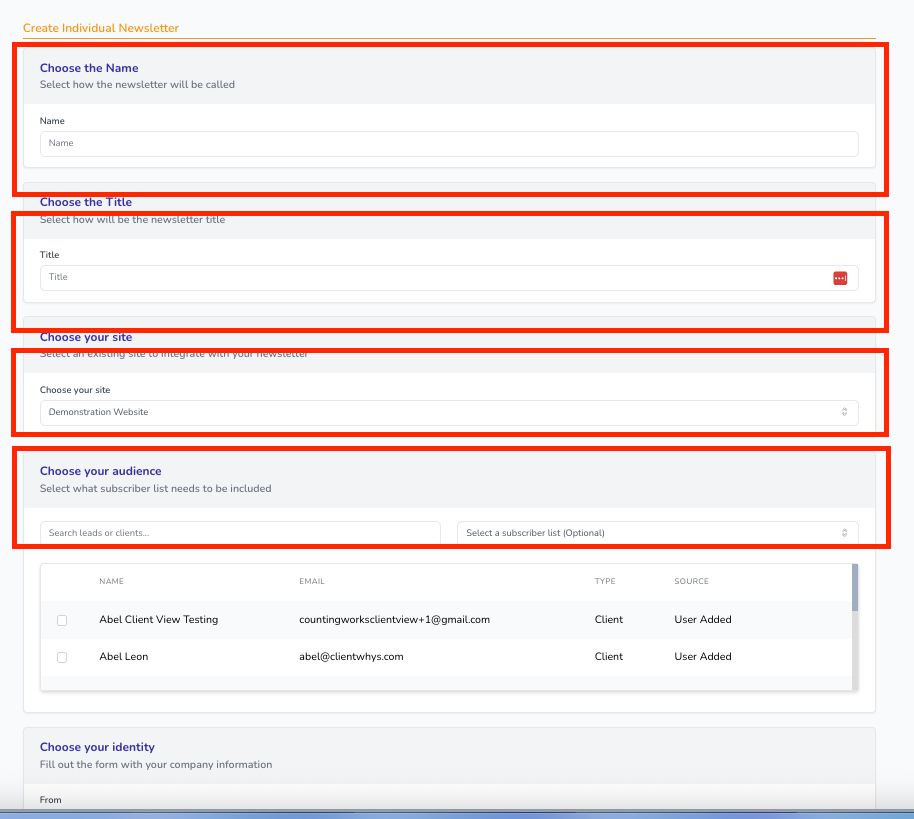
Step 3: Create a New Newsletter
- After clicking on the Create button.
- Name the Newsletter
- Choose the Title of the Newsletter
- Choose the website the newsletter should be associated with
- Select the clients or email list you want to send this email to.
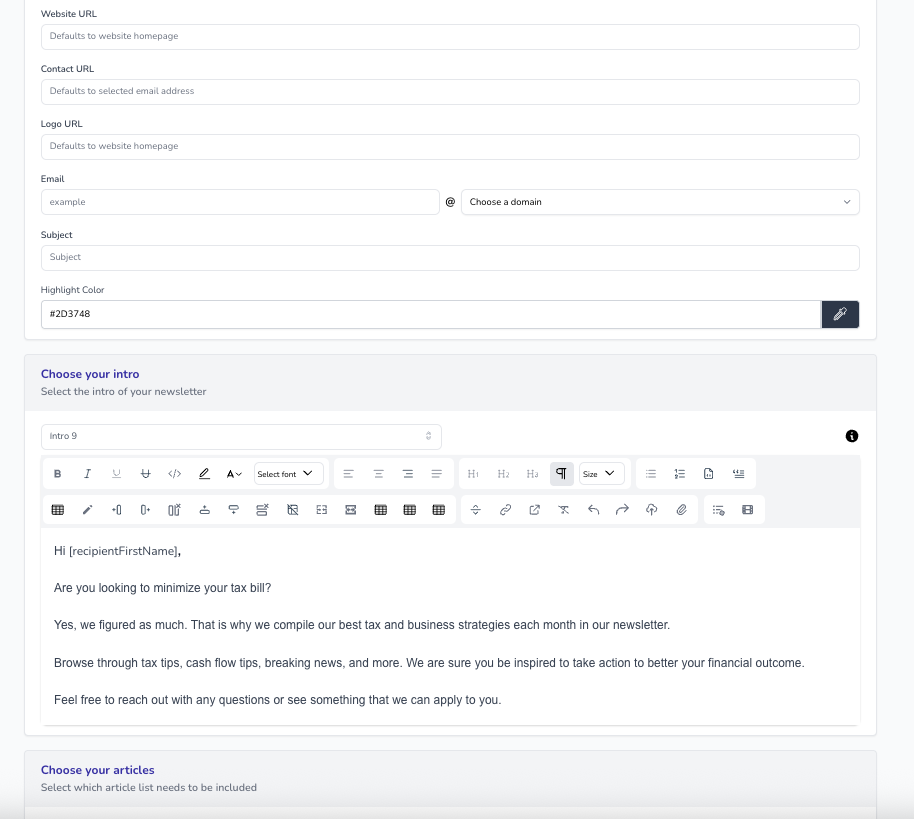
- Enter your Subject Line and Message Content.
- You can fully customize the text just like a regular email in the intro Paragraph
- Choose the email address you want to show the email as coming from.
- Add links, images, or special messages.
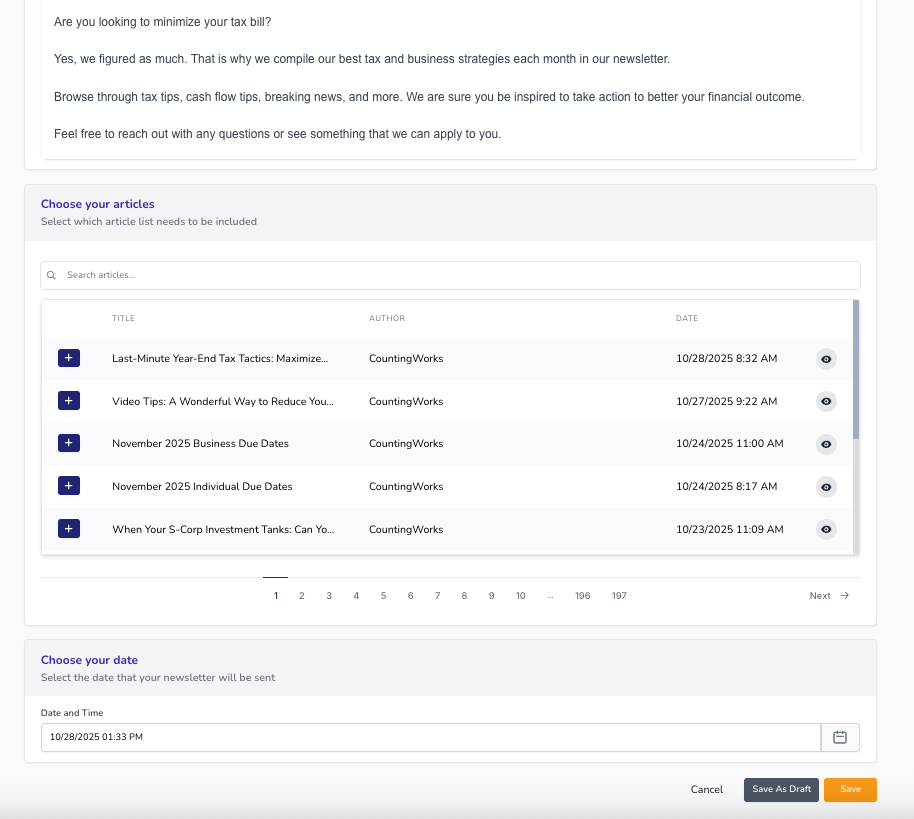
Optional: You can also apply articles from your website blog.
- When creating your message, select from your published blog posts to include them directly in the newsletter.
- This is a great way to share valuable tips, updates, or educational content your client may find useful.
Step 4: Review and Send
- Review your newsletter to make sure all details and links look correct choose a date and time for the email to be sent then click on Save.
- You can also choose Save as Draft if you want to review or edit it later.
✅ Tips
- Use the Individual Newsletter feature for one time emails that you want to send to a few clients or an entire list to communicate things such as tax reminders, announcements, or sharing a specific article.