View our video below and/or follow the step-by-step instructions listed beneath the video.
Step 1: Get Your Outlook Calendar ICS Link
- Sign in to the Microsoft account that you want to integrate with CountingWorks PRO.
- CountingWorks PRO integrates with the Outlook Web App, so make sure you’re signing in with the same Microsoft account your desktop Outlook app is synced with.
- Once signed in, click the Settings (gear icon) in the upper-right corner.

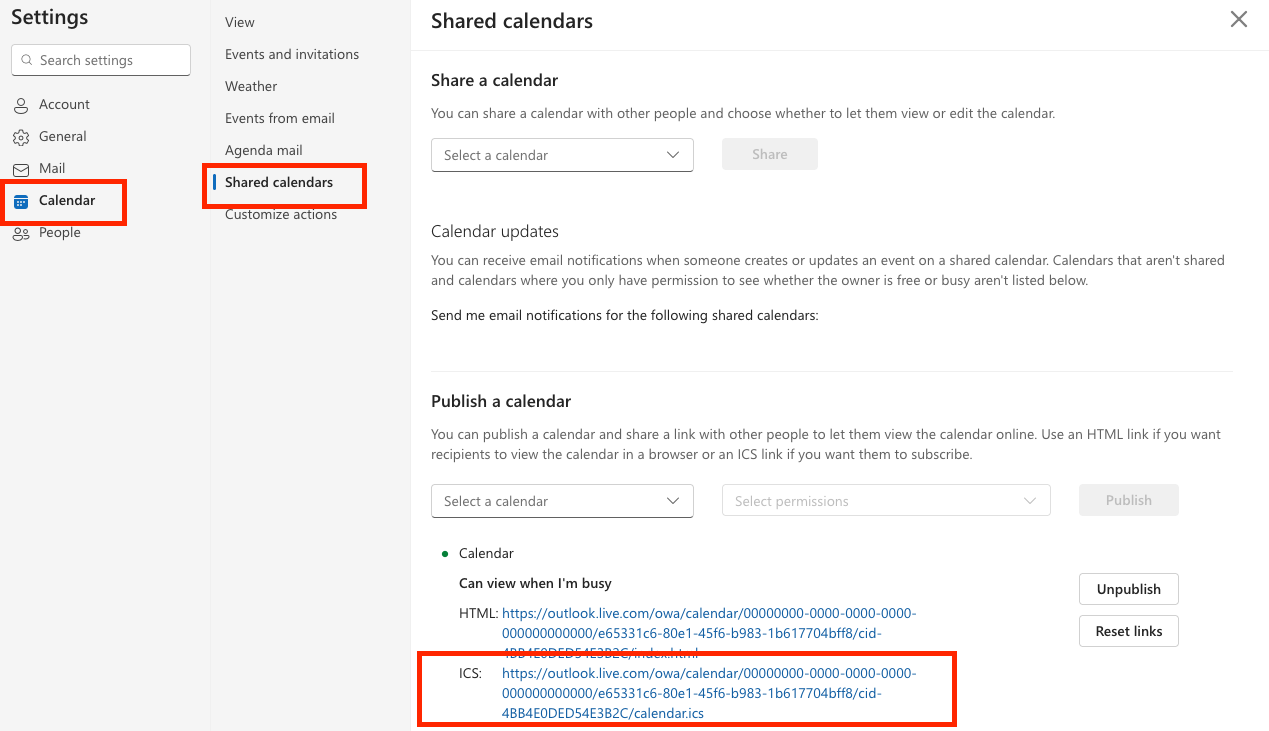
- In the settings panel, select Calendar → Shared Calendars.
- Scroll down to the “Publish a Calendar” section.
- Select the calendar you want to integrate.
- For permissions, choose “Can view when I’m busy.”
- Click Publish, then copy the provided ICS link to your clipboard.
Step 2: Add the Calendar to CountingWorks PRO
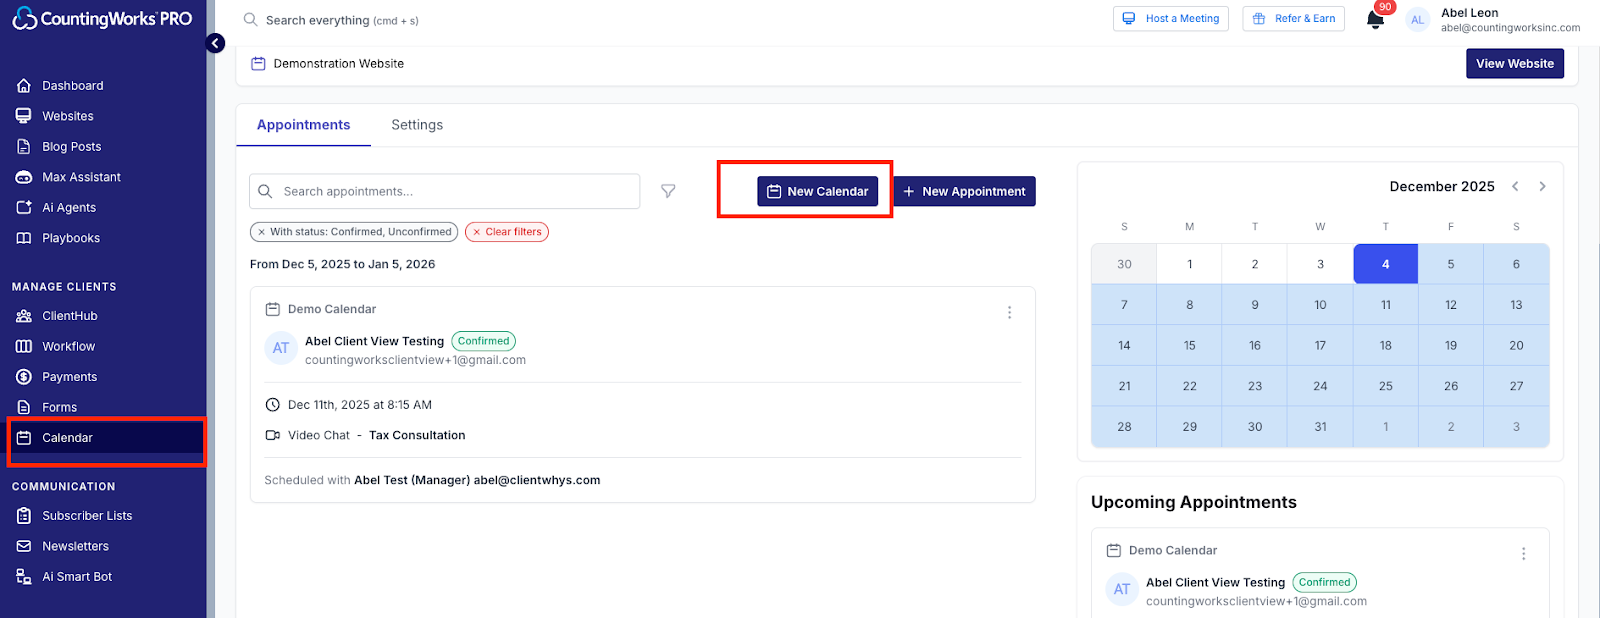
- In CountingWorks PRO, navigate to Calendar in the left menu.
- Choose one of the following:
- New Calendar — to set up a brand new calendar.
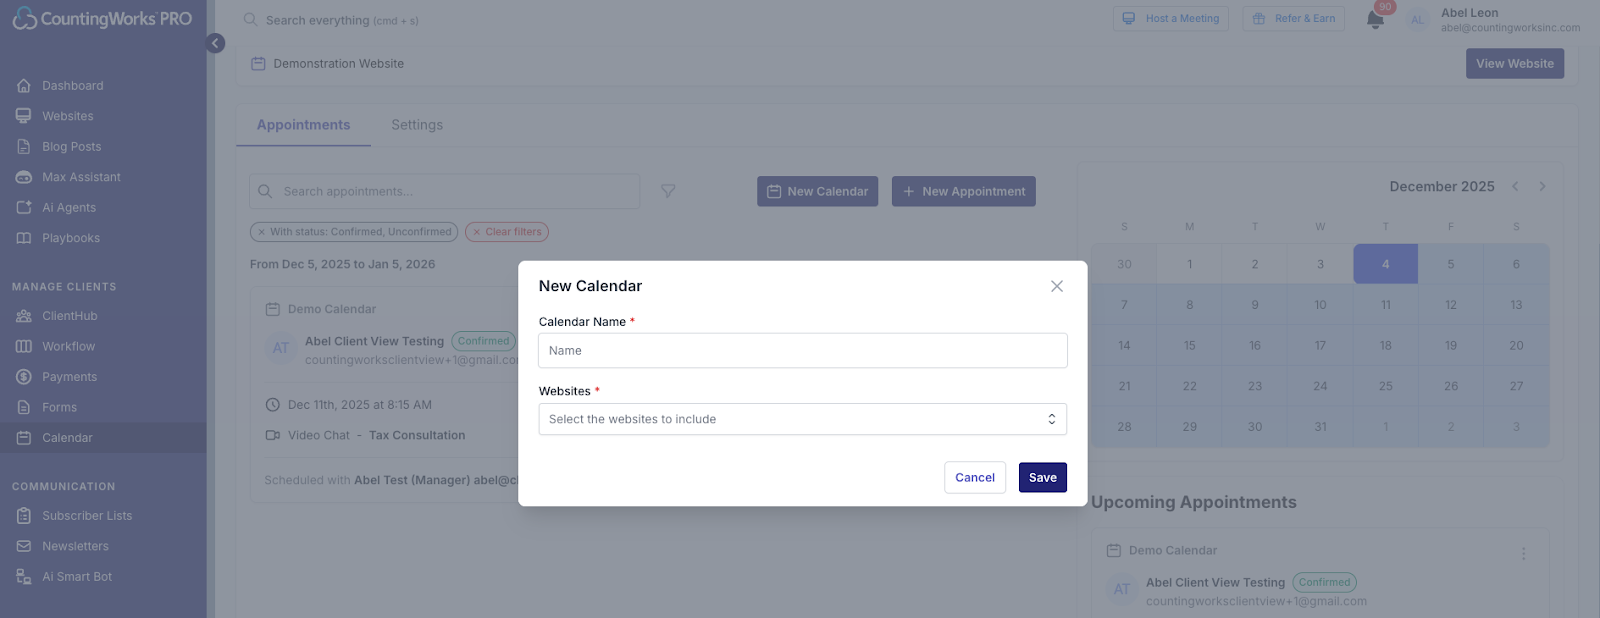
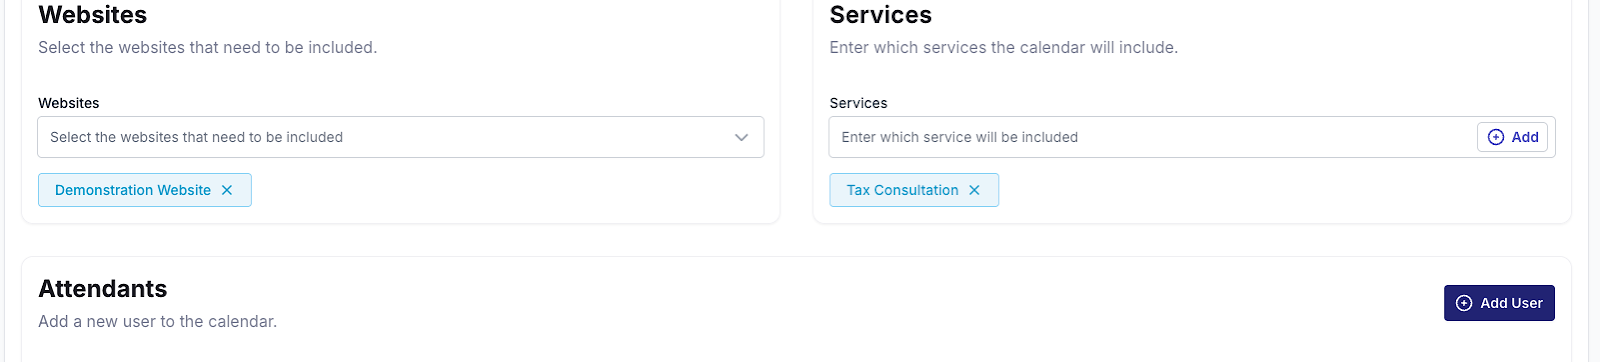
When creating a New Calendar
- Enter a Calendar Name.
- Select the Website you want this calendar associated with.
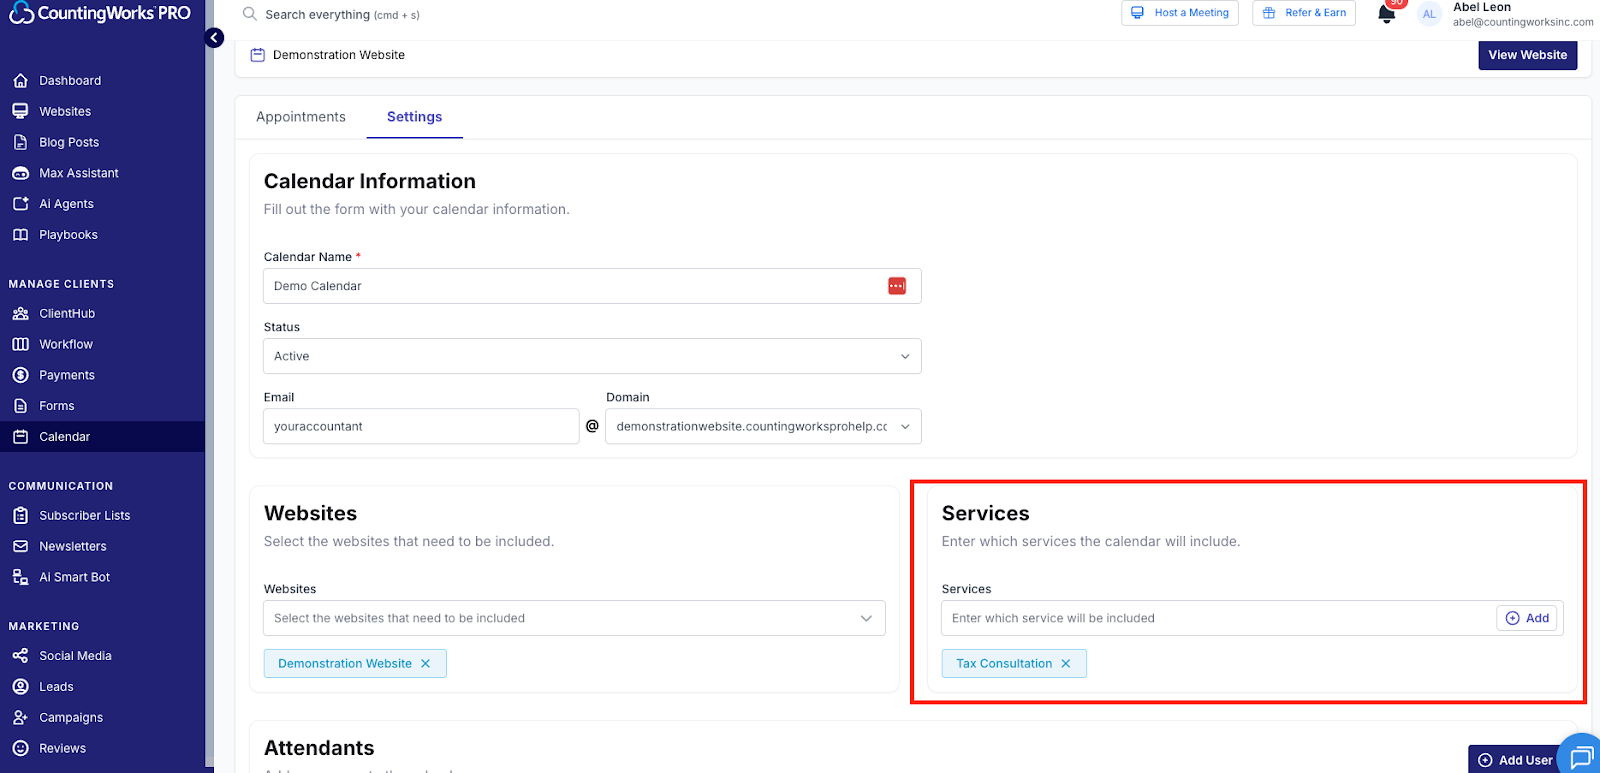
- Add at least one Service:
- Type the service name into the Services field.
- Click Add.
- Add a Team Member:
- Click Add User.
- Fill out each required field.
- Paste the ICS link (from Step 1) into the Outlook calendar link field.
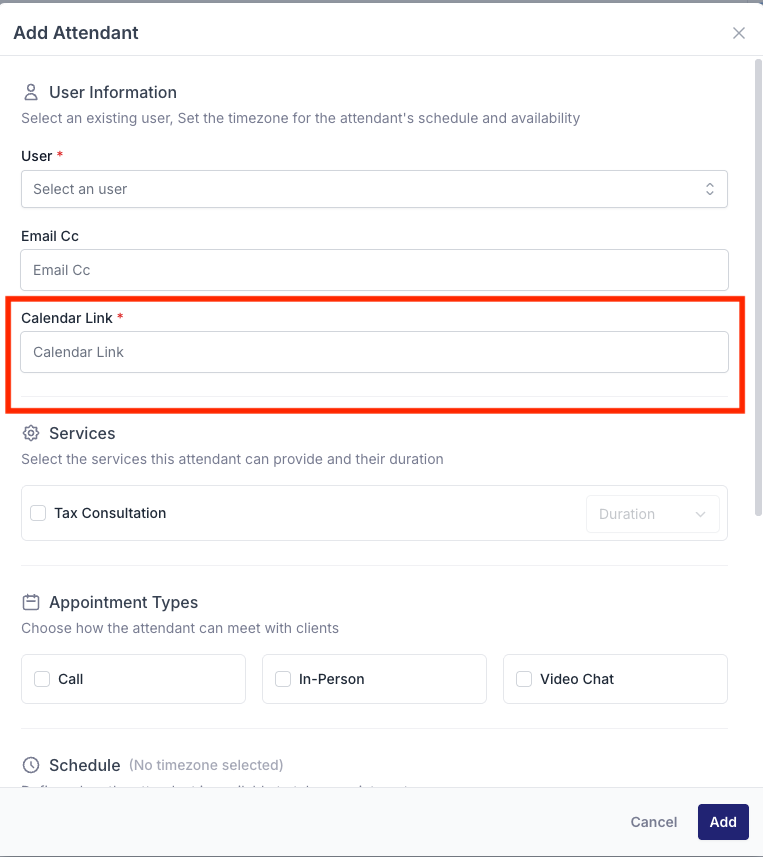
- Select the Service you created and choose the Appointment Duration.
- Mark the Appointment Type.
- Set your Availability by choosing the days and times clients can book.
- When you're finished, click Add.
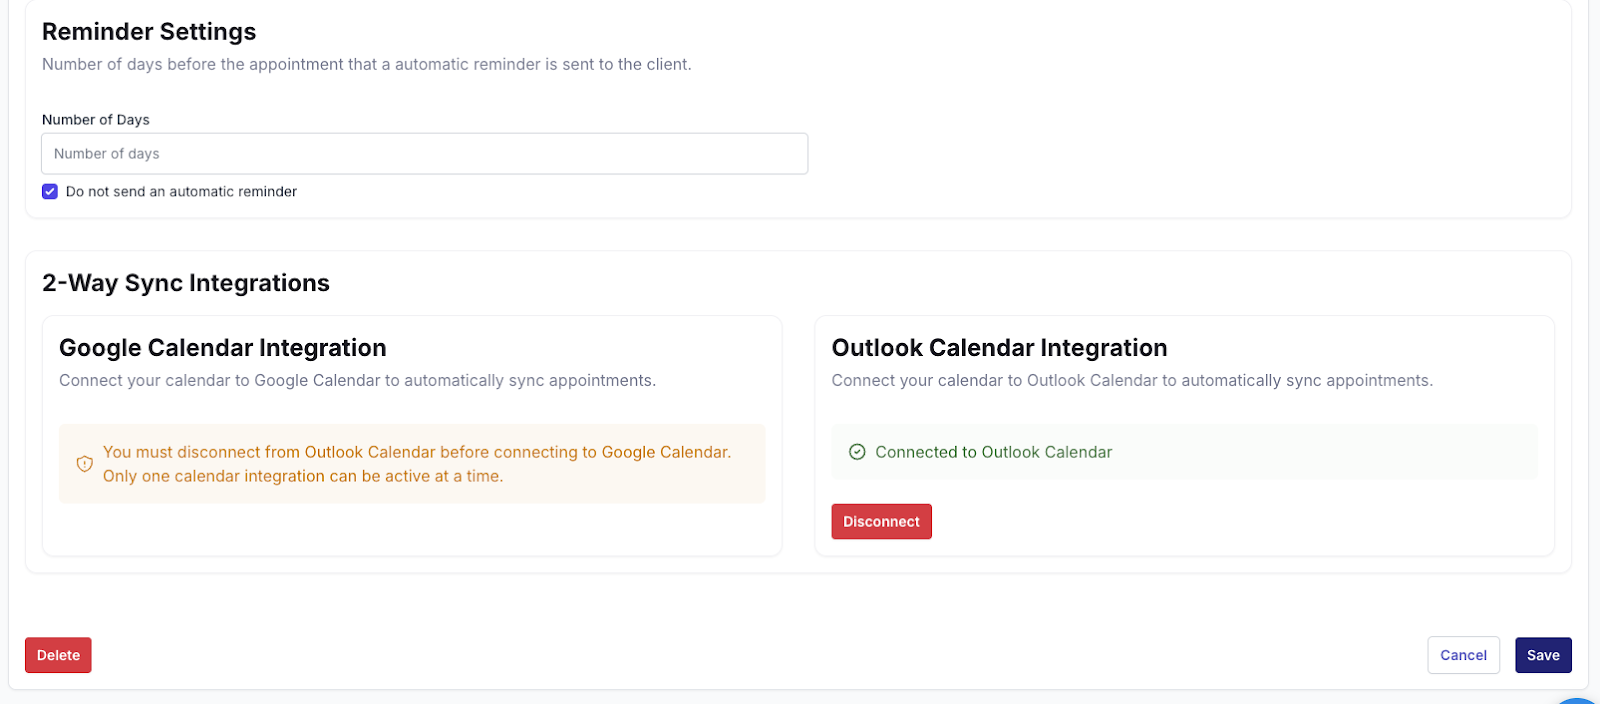
- Choose how many days before an appointment you want clients to receive a Reminder Email from CountingWorks PRO.
- Under Outlook Calendar Integration, click Connect.
- Click Save to finalize the integration.
You're all set!
Your Outlook calendar should now be synced with CountingWorks PRO so all new appointments appear directly on your Microsoft calendar.