Adding Clients:
1. When you are logged into the 3.0 platform, navigate to Client Hub located under manage clients in the main menu then click on Import Clients:
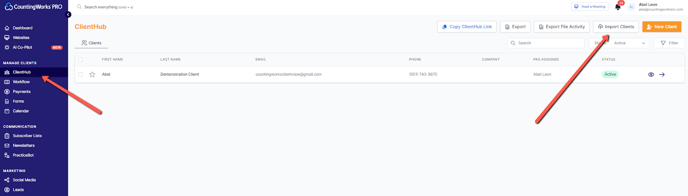
Note: To add a single client, click the orange 'New Client' button and follow the prompts. If you have more than a few clients, the list method described below is recommended.
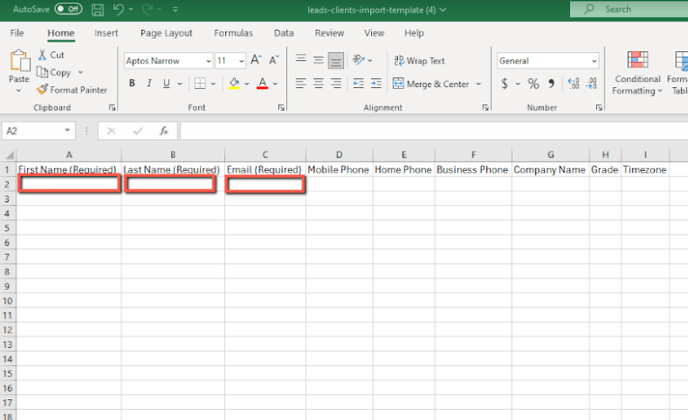
2. Download the File Template.
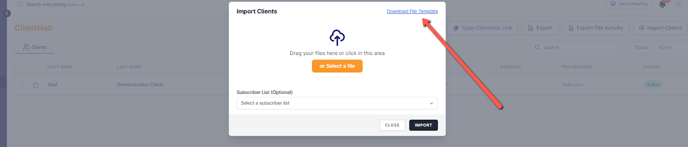
3. Complete the template; do not alter the spreadsheet headings or the list will not import. Once the template has been filled in, save it in a .csv format.
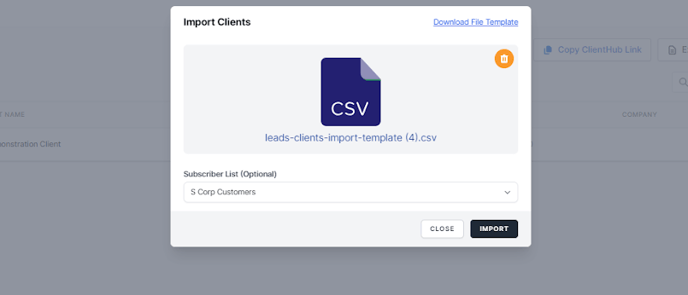
4. Drag and drop the .csv file into the pop up box or click the button to select the file from your computer.
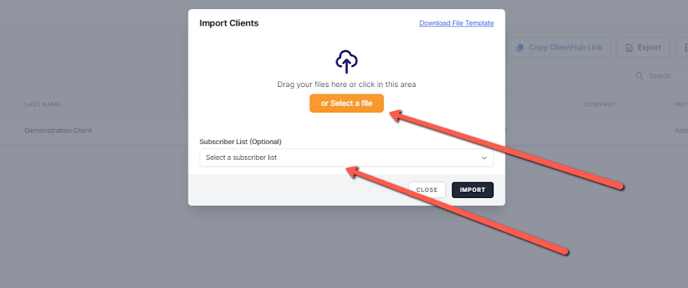
5. Next you choose a subscriber list (Optional) then choose an assignee (Optional) and click import. Then you’re done!