This guide walks you through how to:
- Add and manage staff members
- Assign roles and permissions
- Configure firm-wide and personal notification settings
Accessing Your Settings
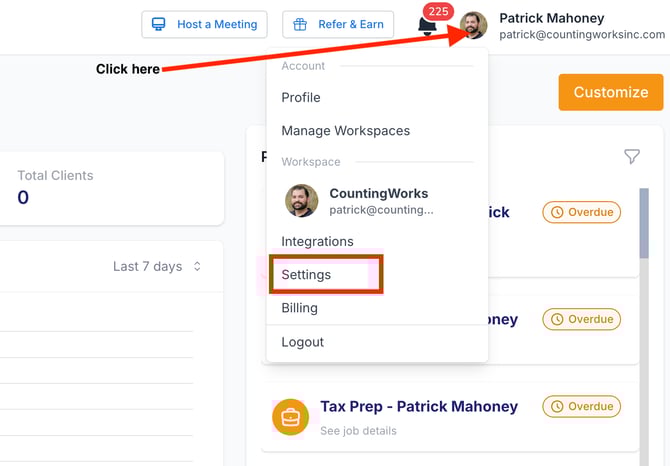
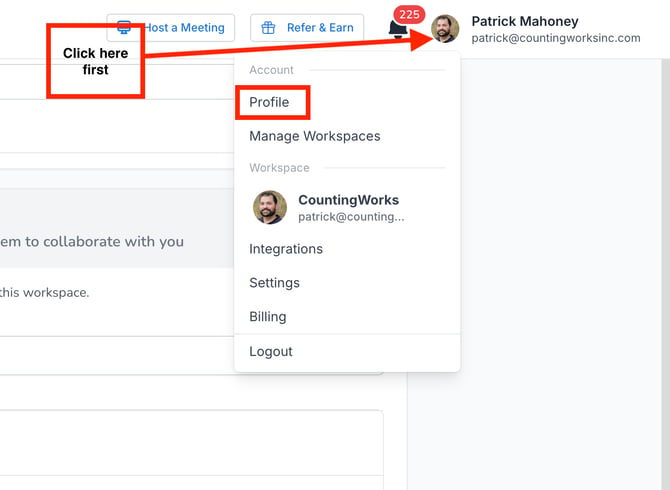
- Log in to your CountingWorks PRO account
- Click your profile icon or initials in the top-right corner
- Select Settings from the dropdown menu
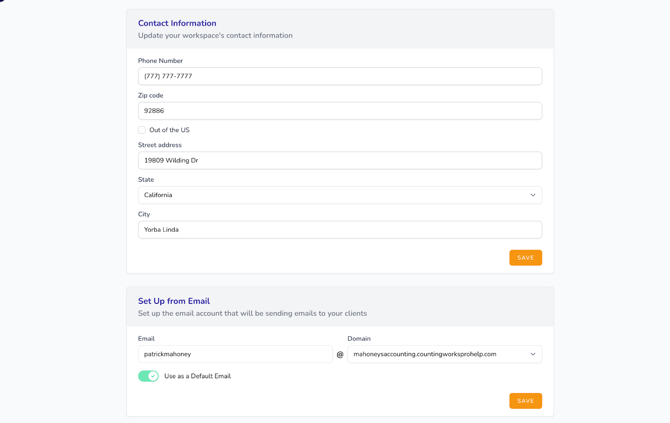
Updating Firm Information
In the Settings page, you can configure your firm details:
- Enter or update your firm information
- Set your firm email address
- This email is used for all outgoing client communications
- Upload your logo and branding for your Client Hub
Configuring Client Hub Settings
Assigning Client Hub Seats
In the General section:
- Assign Client Hub products (e.g., Workflow, Payments) to staff members
- Staff must:
- Be invited to the platform
- Accept their invitation

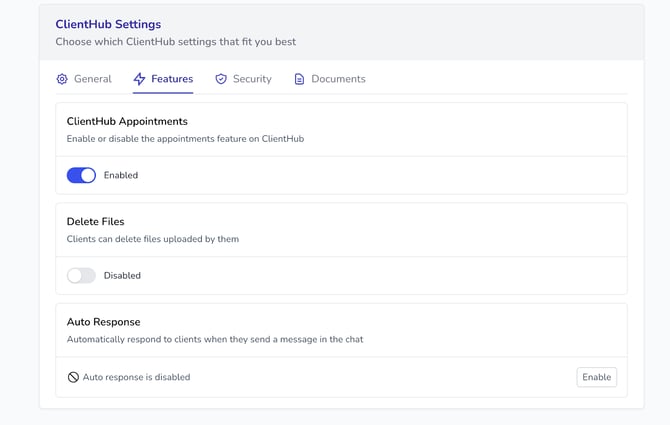
Enabling Features
In the Features section, you can enable:
Appointments
- Connect with Google Calendar or Outlook
- Allow clients to schedule meetings directly from their portal
File Deletion
- Give clients the ability to delete uploaded files
Autoresponder
- Set automatic replies when you’re unavailable
- Choose a date range, select days, and enter a custom message
💡 Tip: The autoresponder is especially useful during tax season or when your office is closed.
Security Settings
- Enable Two-Factor Authentication (2FA) for added protection
- Clients will be prompted to set this up
- You can disable 2FA for individual clients if needed
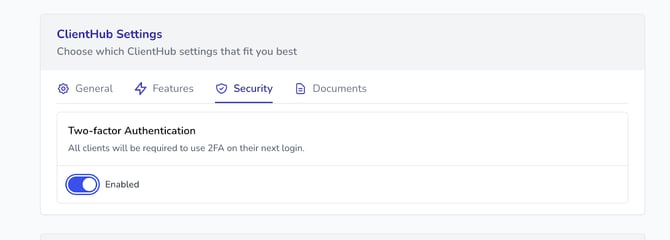
⚠️ Recommendation: Always enable 2FA to protect sensitive client data.
Document & AI Settings (MAX AI)
- Enable document analysis to allow MAX AI to review files and provide smarter responses
- Choose:
- New uploads only, or
- All documents (historical + new)
- Exclude specific clients if needed

💡 Tip: Enabling this feature improves AI-generated insights and responses across the platform.
File Purge Settings
- Set automatic deletion of files and folders
- Configure:
- Time intervals (e.g., every 30 days)
- Per-client settings
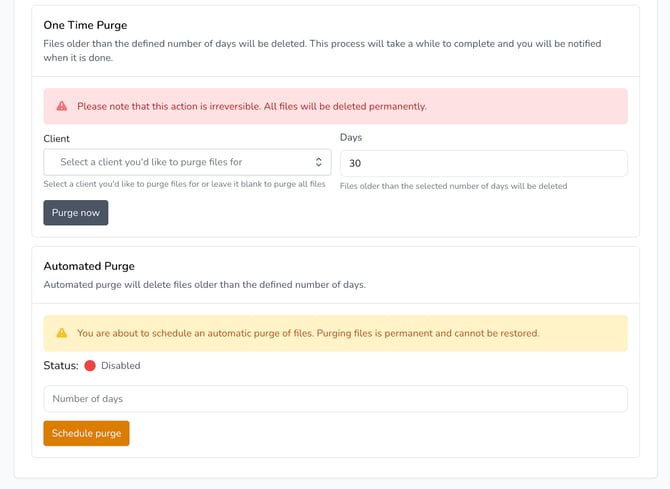
⚠️ Important:
Files deleted using the purge tool are permanently removed and cannot be recovered.
Managing Notifications by Role
In the Notifications section:
- Assign which roles receive specific alerts (e.g., new client registrations)
Available roles:
- Administrator
- Manager
- Staff
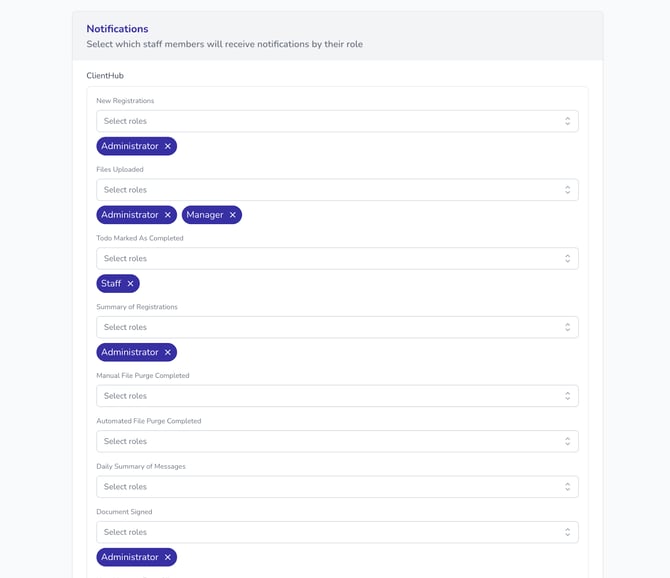
⚠️ Note: Do not use the “Attendant” role, as it is not currently supported.
Adding Staff Members
To add a new team member:
- Scroll to the Workspace Members section
- Enter the staff member’s email address
- Select their role
- Click Add
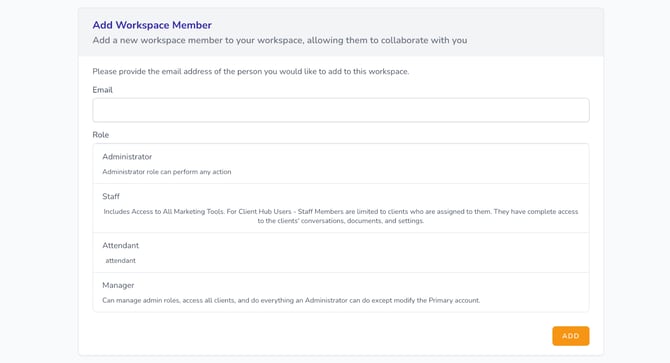
Role Permissions Overview
Administrator
- Full access to all settings and features
Manager
- Similar access to Administrator
- Cannot remove Administrators
Staff
- Can use marketing tools and communicate with clients
- Must be assigned a Client Hub seat
- Can only access clients they are assigned to
💡 Tip: Assign Client Hub seats to any staff member who needs to communicate with clients.
Managing Existing Staff
- Click on a staff member to:
- Update their role
- Remove them from the workspace

Personal Notification Settings (Per User)
Each team member can customize their own notifications:
- Click the profile icon
- Select Profile
Notification Types
Users can enable or disable:
- Email notifications
- In-app notifications (bell icon in the top-right)
- SMS notifications

💡 Tip: Notification preferences are personal and do not affect other team members.
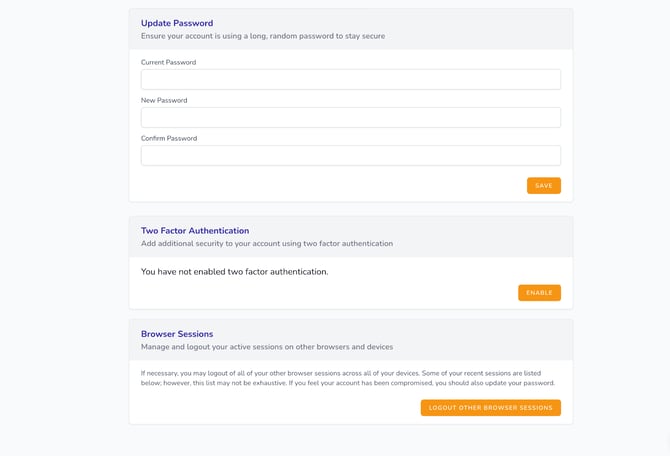
Additional User Settings
From the Profile section, users can also:
- Update their password
- Enable Two-Factor Authentication (2FA)
- Manage browser sessions
- Log out of all active sessions remotely