This guide walks you through the full process:
- Importing your client list
- Creating and assigning tags
- Sending client portal invitations
Importing Your Client List
Instead of adding clients one at a time, you can import them in bulk using a CSV file.
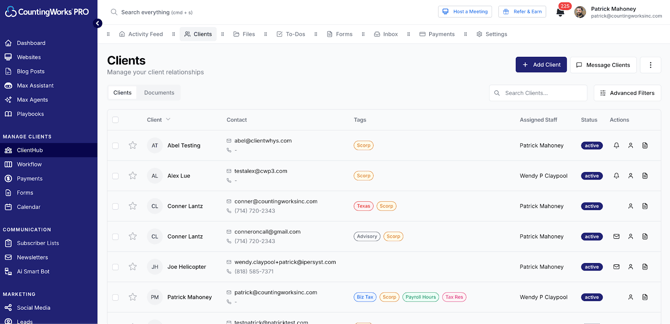
Step 1: Navigate to Clients
- Click Client Hub from the left menu
- Select Clients at the top
Step 2: Download the Import Template
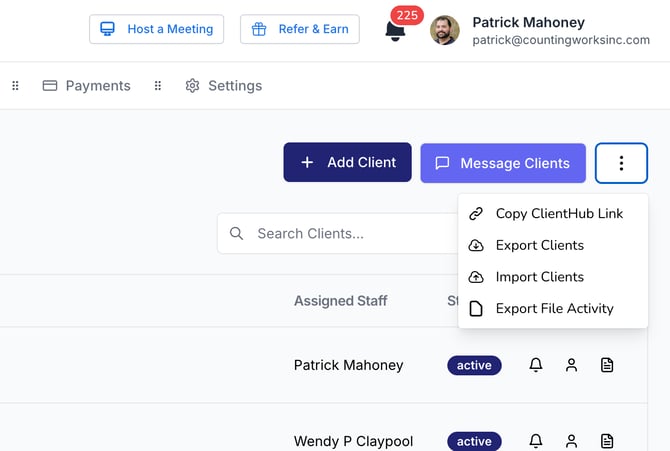
- Click the three-dot menu (top right)
- Select Import Clients
- Click Download File Template
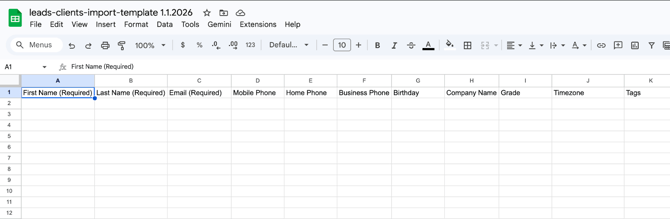
Step 3: Complete the CSV File
Open the template and enter your client data.
Required fields:
- First Name
- Last Name
Optional fields:
- Additional client details
- Tags (recommended)
💡 Tip:
You can pre-tag clients in the CSV (Column K) to save time later.
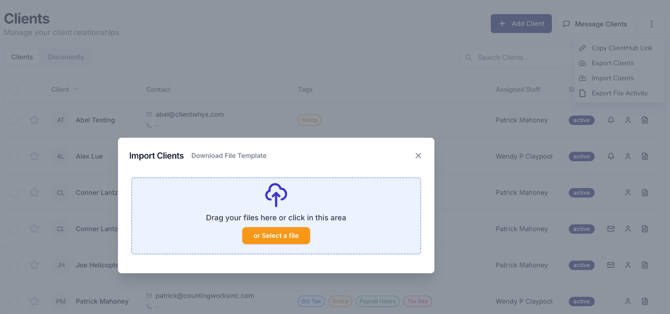
Step 4: Upload Your File
- Return to the platform
- Drag and drop your CSV file, or select it from your computer
- Click Import
Once complete, your clients will appear in the system.
Creating and Managing Tags
Tags help you organize clients and power targeted marketing campaigns.
Why Tags Matter
Tags are not just for organization—they allow you to:
- Filter and group clients
- Send targeted communications
- Use segmented marketing and automated playbooks
💡 Tip:
Tags enable more personalized and effective client communication.
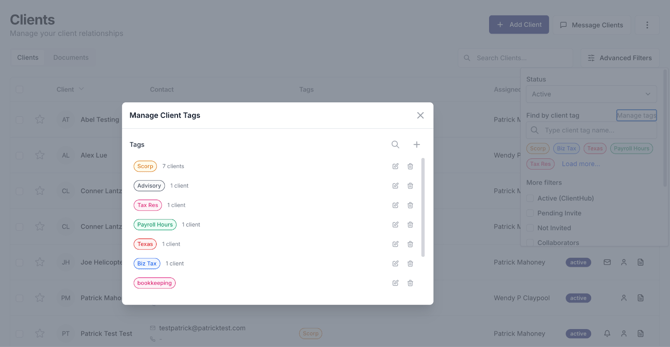
Creating Tags
- Click Advanced Filters
- Select Manage Tags
- Click the + (plus icon)
- Enter a tag name and choose a color
- Click Create Tag
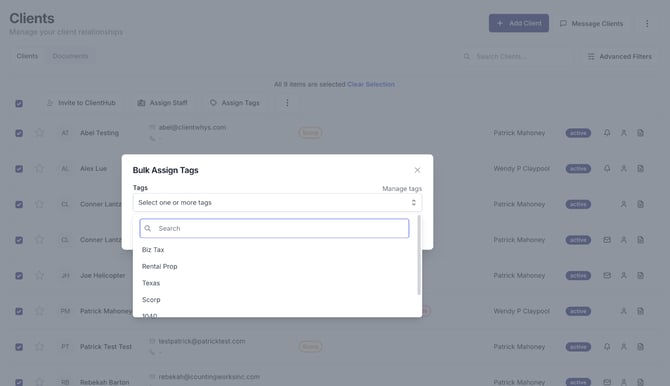
Assigning Tags to Clients (Bulk)
- Select one or more clients using checkboxes
- Click Assign Tags
- Choose an existing tag or create a new one
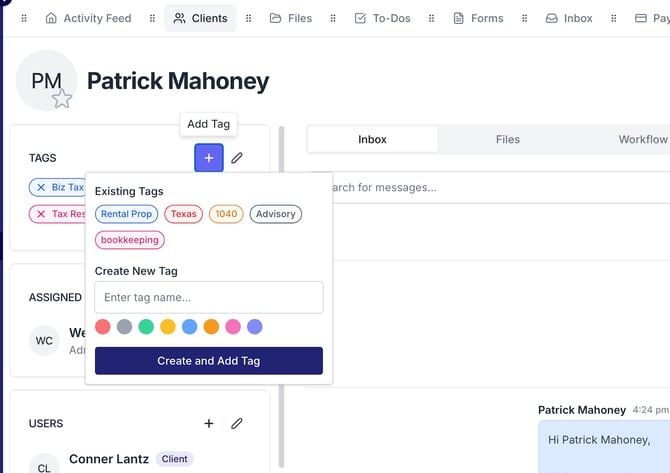
Assigning Tags from Client Profile
- Click a client’s name
- On the client detail page:
- Add a tag
- Remove a tag (click X)
Inviting Clients to the Portal
Once clients are added, you can invite them to access the secure portal.
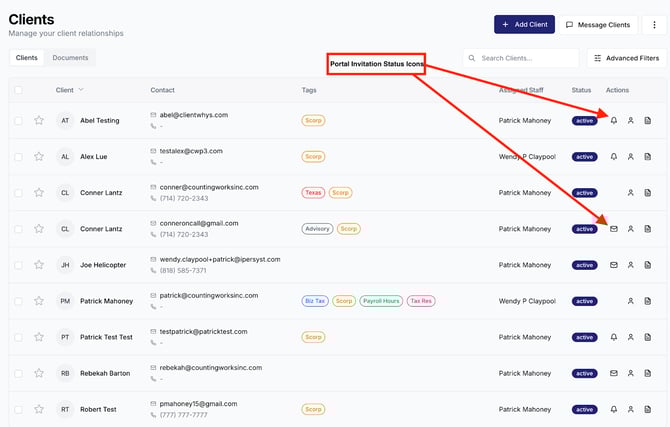
Understanding Invitation Status Icons
In the client list:
- ✉️ Envelope icon → Client has not been invited
- 🔔 Bell icon → Invited but not yet accepted
- No icon → Client has accepted and is active
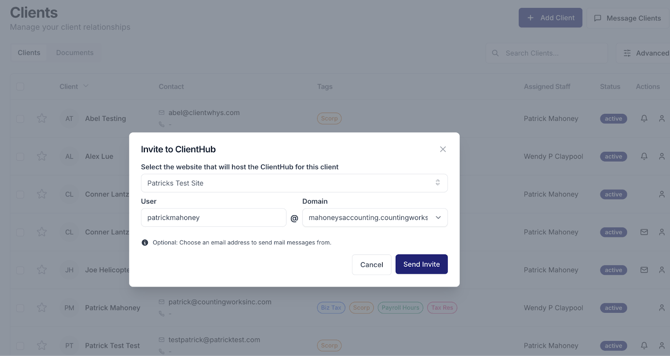
Inviting Clients Individually
- Click the envelope icon next to a client
- Enter your domain email address
- Select your domain
- Click Send Invitation
💡 Important:
Use a domain email (e.g., yourname@yourfirm.com) to improve deliverability.
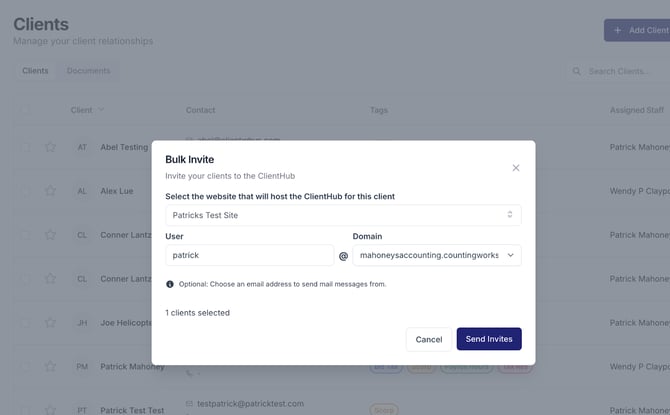
Inviting Clients in Bulk
- Select multiple clients using checkboxes
- Click Invite to Client Hub
- Enter your domain email
- Send invitations
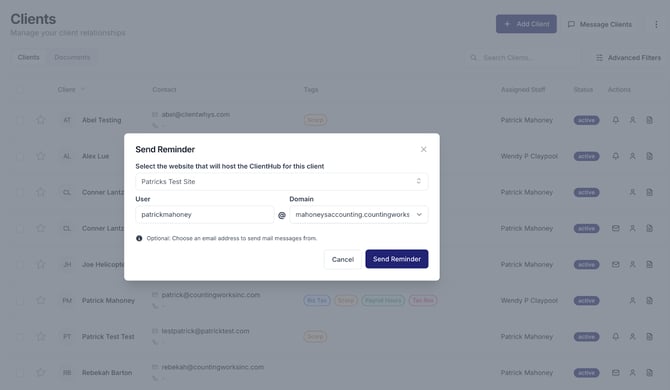
Re-Inviting Pending Clients
To resend invitations:
- Click Advanced Filters
- Select Pending Invites
- Select clients
- Click Invite to Client Hub
- Or Send Individual reminder by clicking the bell icon
Summary
By completing these steps, you will:
- Import your full client list quickly
- Organize clients using tags
- Enable targeted communication and marketing
- Invite clients into the secure portal
Best Practices
💡 Import clients in bulk using the CSV template
💡 Use tags early to stay organized
💡 Leverage tags for targeted marketing campaigns
💡 Send invitations in bulk to save time
💡 Use filters to follow up with clients who haven’t accepted